Cart empty
Grandma’s Delicious Swiss Roll
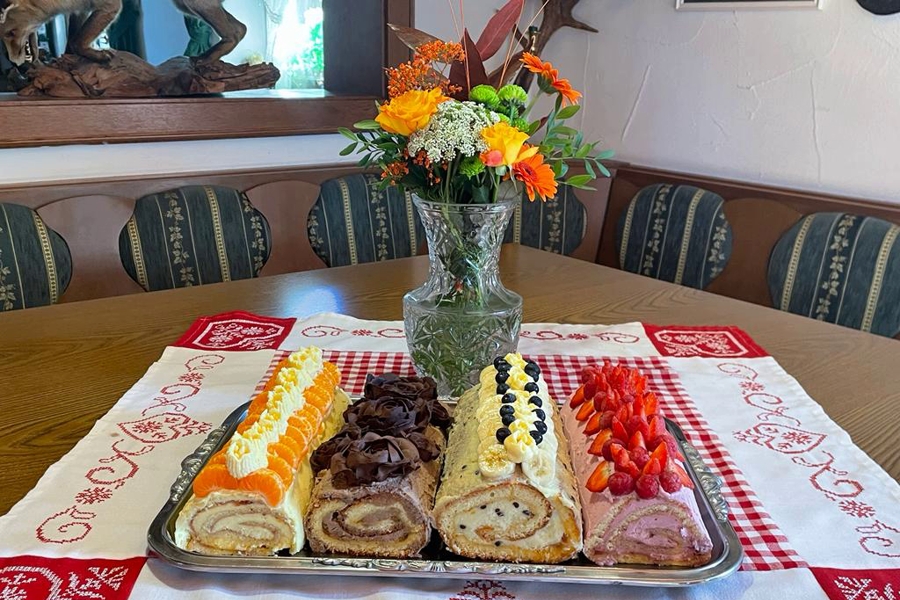
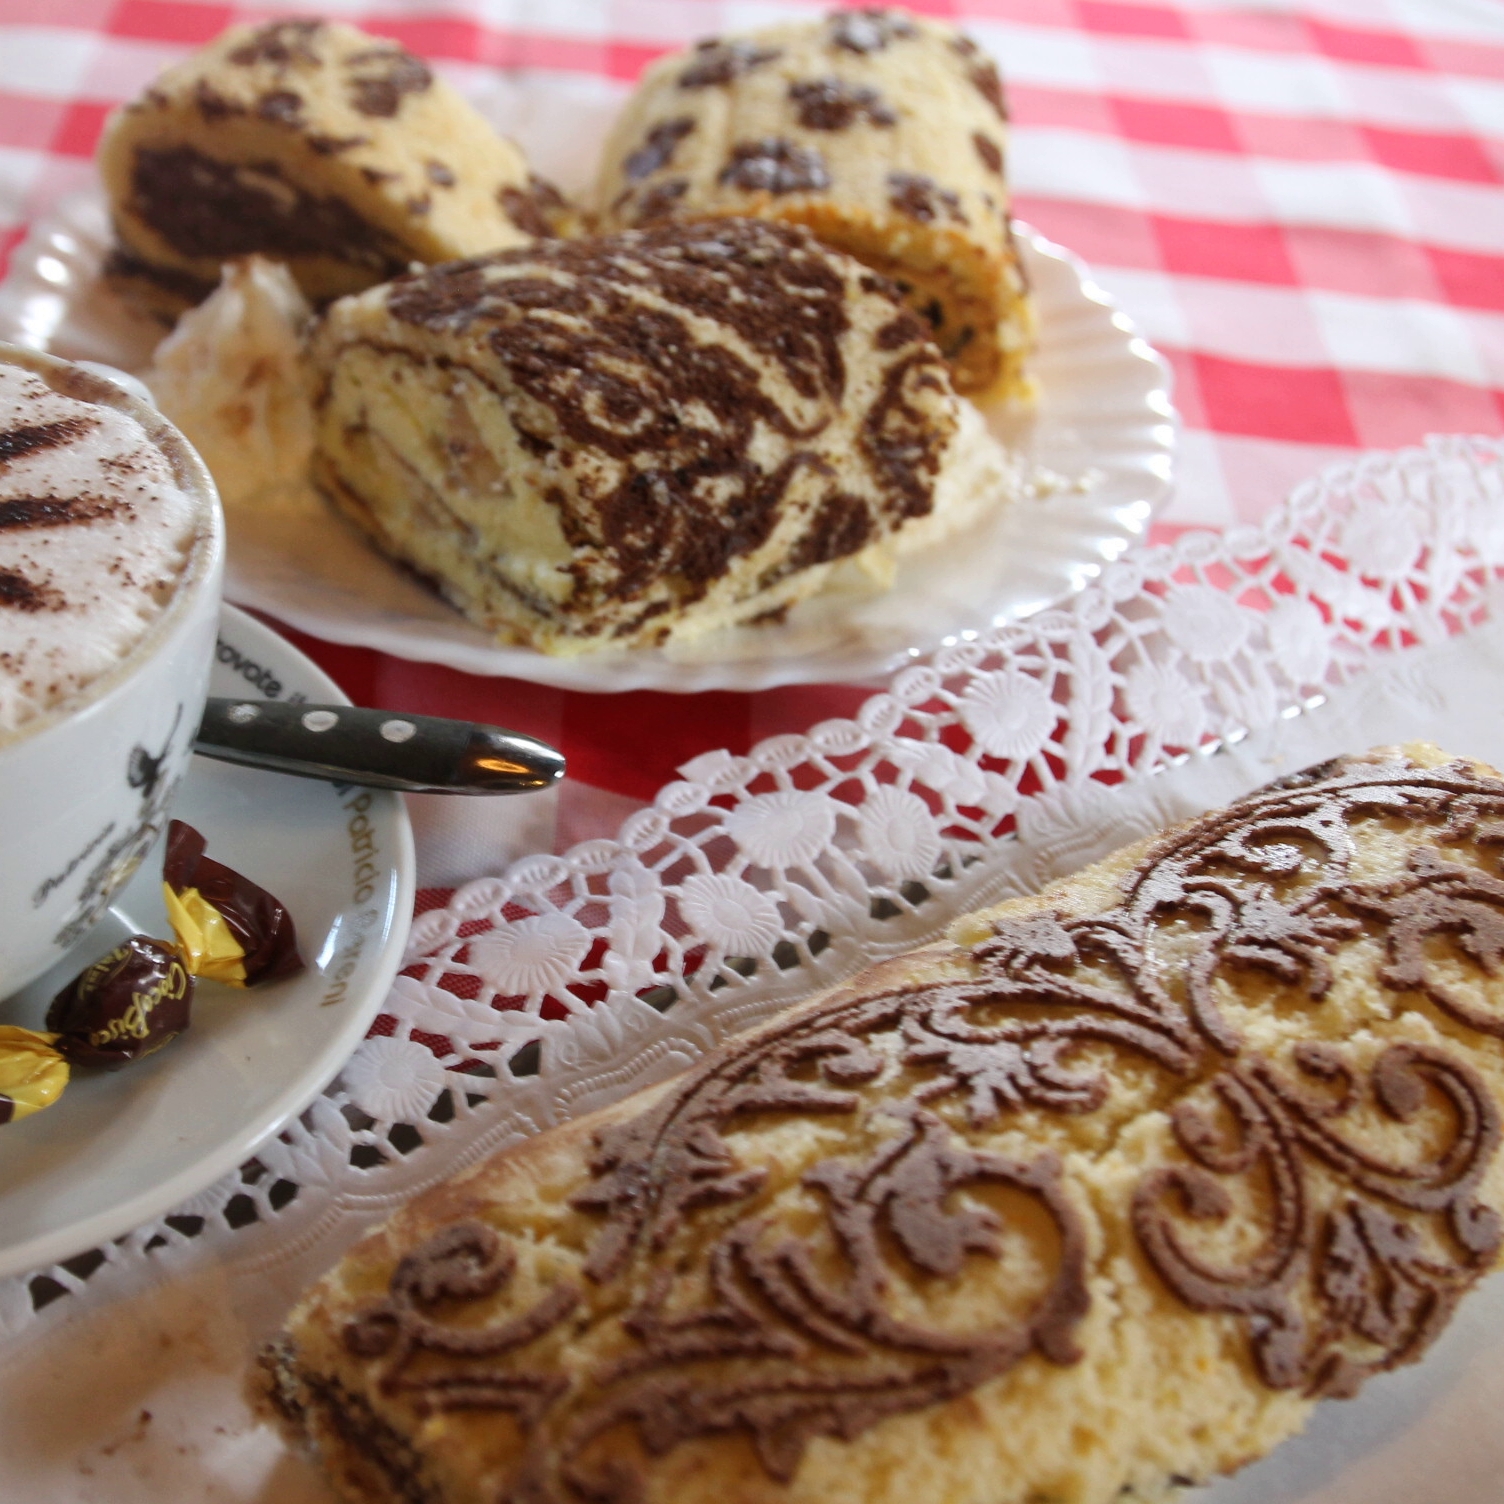
Swiss rolls are part of my childhood memories, when my grandmother would always bring fantastic rolls whenever she visited us, and they would disappear in no time. Later, my mother used to bake them as well, and now it is I who continues the tradition. While my grandmother would simply dust her Swiss rolls with powdered sugar, my mother topped them with chocolate glaze. I like to combine both approaches, but I also try to experiment with new creams, fillings, and decorations.
While we can vary the creams and fillings, the sponge batter itself is crucial — and in our family, we have been using the same recipe for generations. It has to be elastic enough so the roll does not crack when being rolled up. And so, with all due respect to my grandmother and my mother, I am passing this family treasure on to you.
I hope it turns out perfectly for you!
Ingredients:
Batter:
-
100 g powdered
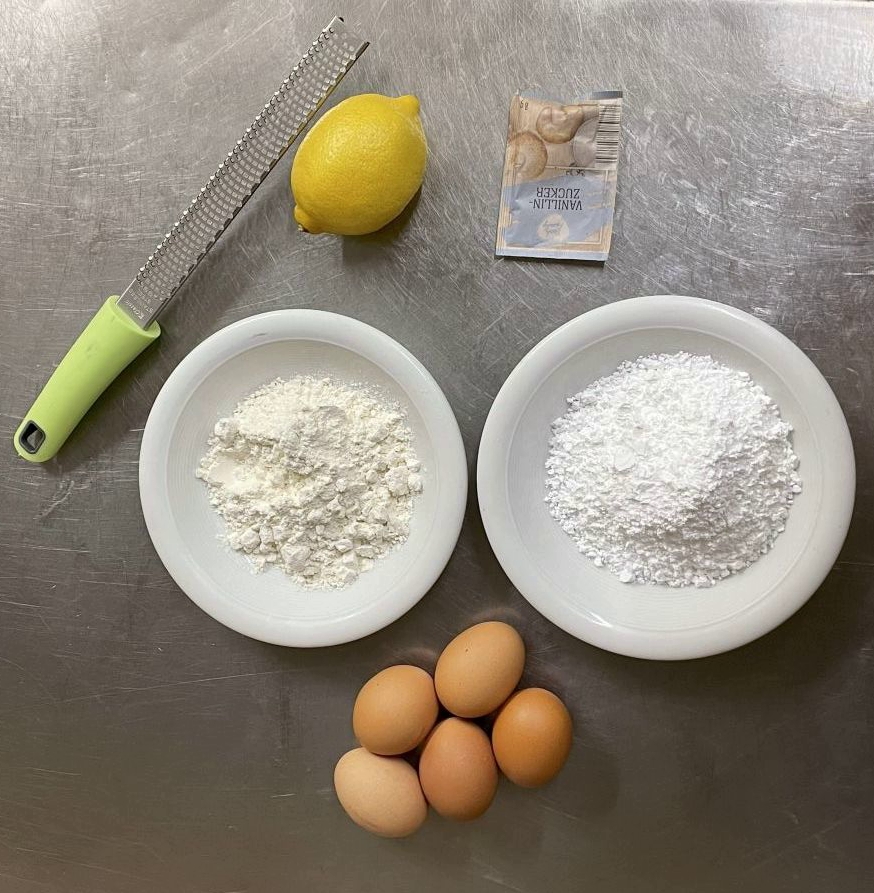 sugar (3.5 oz / ¾ cup)
 -
5 eggs – separated (yolks and whites)
-
pinch of salt
-
1 packet vanilla sugar (8 g / 0.3 oz / 2 tsp)
-
grated lemon zest
-
100 g semi-coarse flour (or cake flour) (3.5 oz / ¾ cup)
Cream:
-
Various filling options – see below at the end of the recipe
Decoration:
-
Chocolate glaze for coating the roll (optional)
-
Stabilized whipped cream or buttercream
-
Fresh fruit, chocolate sprinkles, etc.

Method
Preparing the baking tray:

First, prepare the baking trays by attaching the baking paper with a bit of fat so it sticks firmly. Then brush the entire paper with butter and sprinkle it with coarse semolina (you can also use fine semolina, coarse flour, or even a little cornmeal if that’s what you have available). You might think that baking paper doesn’t need greasing or dusting, but trust me – this method ensures that even the thinnest batter will release perfectly from the paper and can be rolled up beautifully without the slightest damage.
Batter
1
First, separate the eggs. 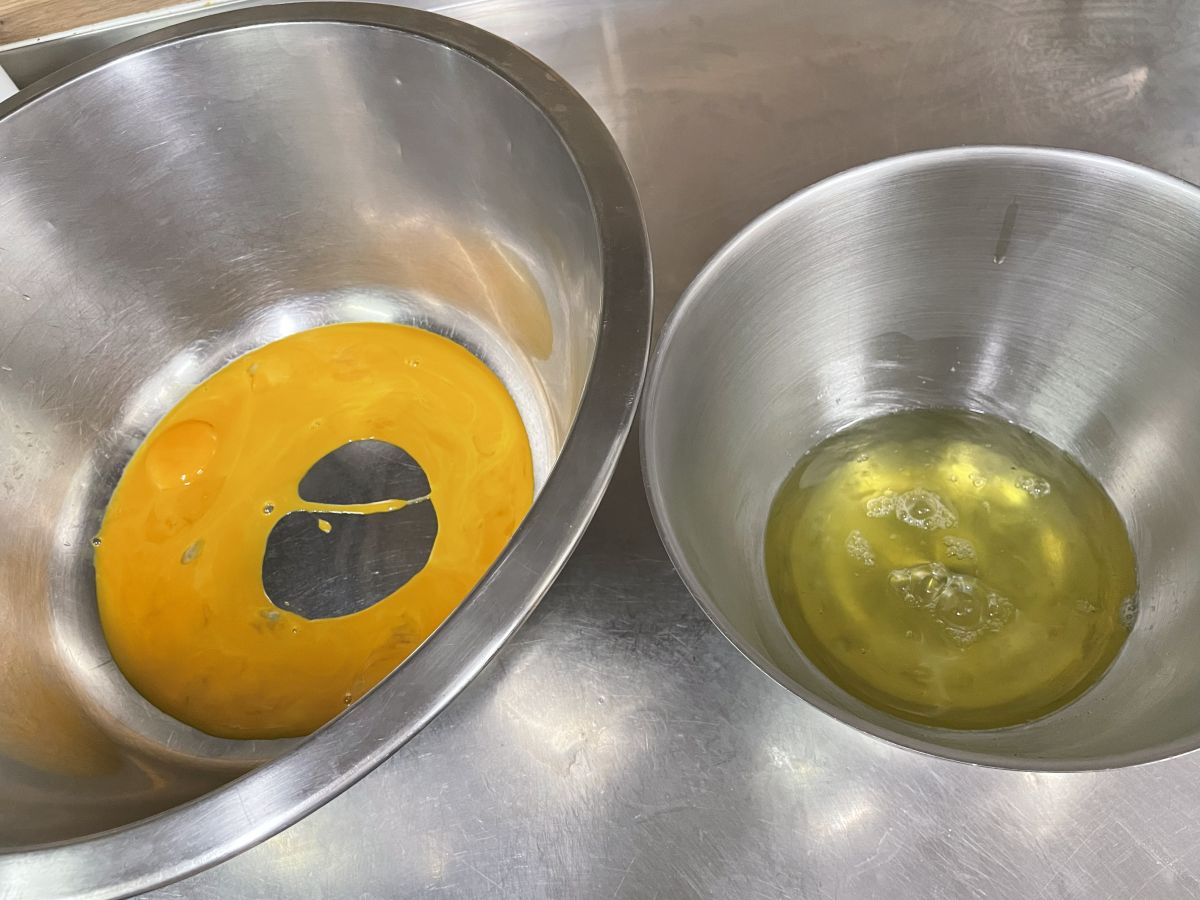 The egg whites must not contain even a drop of yolk (the fat prevents whipping). Pour the whites gradually into a tall bowl (in which they will later be whipped) and place them in the fridge.
2
Beat the powdered sugar, egg yolks, salt, vanilla sugar, and grated lemon zest in a bowl or with a mixer until thick and pale.
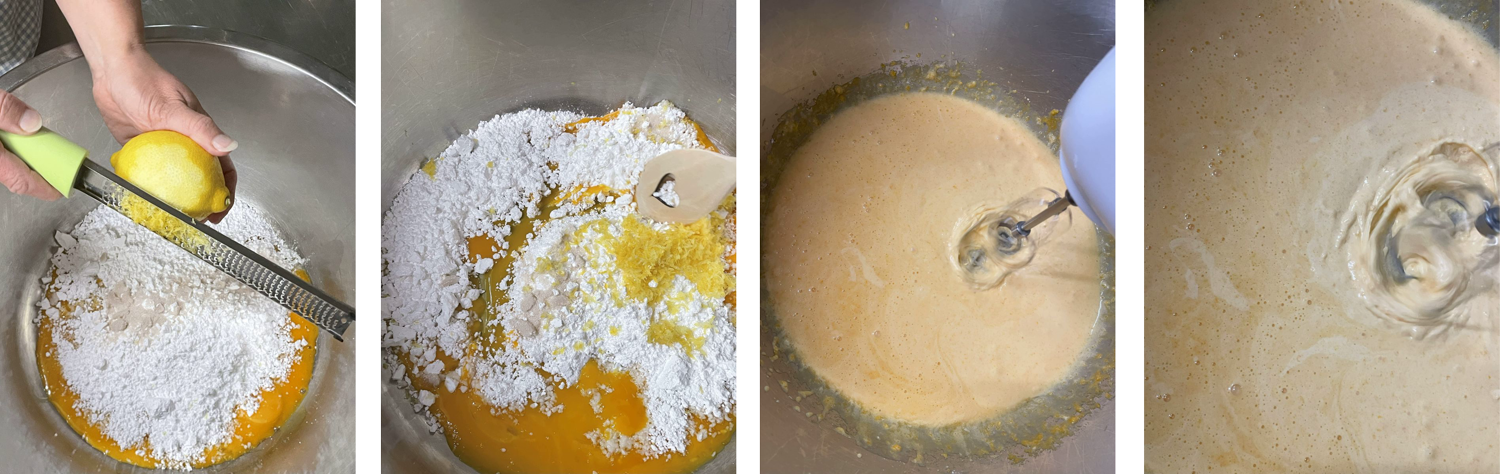
3
Fold in the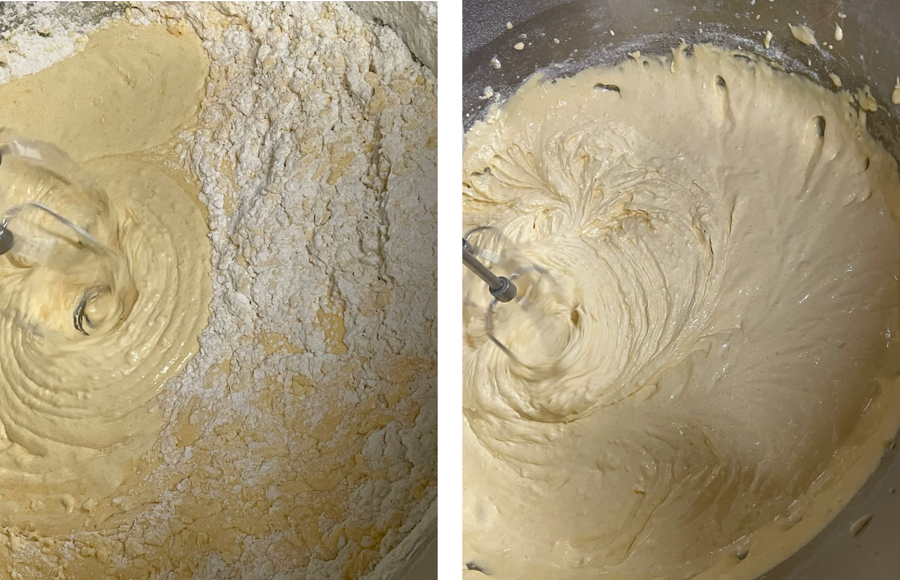 sifted flour.
4
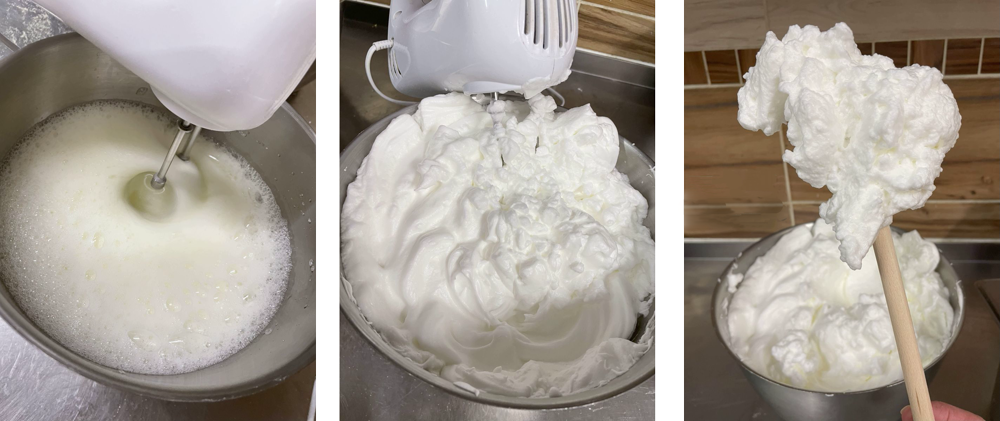
In a separate bowl, whip the egg whites until stiff peaks form. A properly whipped white should cling as a firm peak to the whisk when held upside down. Be careful not to overwhip! Stop occasionally and check the consistency.
5
Once stiff enough,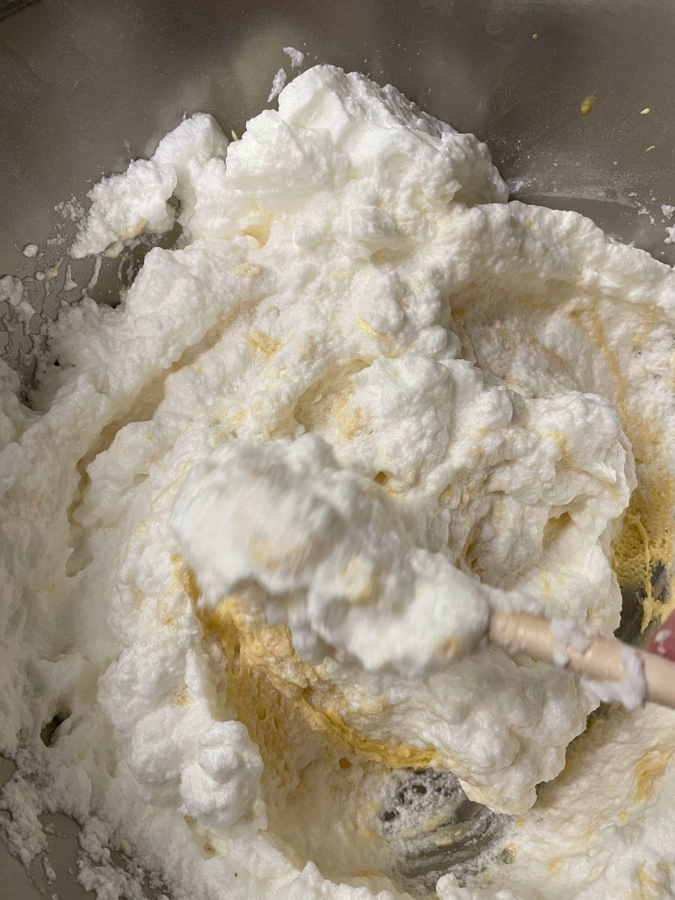 fold the whites gently into the batter using a spatula — never a mixer! Otherwise, the air bubbles will collapse, and the sponge won’t be light and fluffy.
6
Spread the finished batter evenly onto the prepared baking sheet, approximately 1 cm (⅜ in) thick. Bake in a preheated convection oven at 180°C (355°F).
7
Test the baked sponge by inserting a skewer in several places — it should come out dry. Remove from the oven and, while still hot, carefully roll it up. Then unroll again and let cool.
Baking
Baking the sponge roll – total baking time about 10 minutes per tray
Preheat the oven to 180°C and bake the sponge roll for approximately 3 minutes. Then lower the temperature to 160 °C (do not open the oven during baking) and continue baking for another 7 minutes.
It’s best to bake each tray separately. If you bake them on multiple levels, the edges may bake faster than the centre, which can cause the sponge to crack when rolling. The middle part might also remain too pale or even slightly underbaked.
Tip: Set a timer for 3 and 7 minutes to help you keep track of the baking time. During baking, check the sponge through the oven window, especially if you’re making it for the first time, as every oven bakes a little differently.
After this time, test the sponge with a wooden skewer – it should come out completely dry. If any batter sticks to the skewer, bake it for a slightly longer time.
The finished sponge roll should be light brown with a slightly pinkish hue.
It shouldn’t become too dark, as that would make it dry and cause the sponge to crack when rolled.
Filling with Cream
Spread cream over about two-thirds of the cooled sponge, and then roll it tightly. The remaining third will naturally be filled as the cream is pushed during rolling.
You can use various fillings. The simplest is spreading with jam — which tastes great — but even better is combining creams and fruit.
Creams
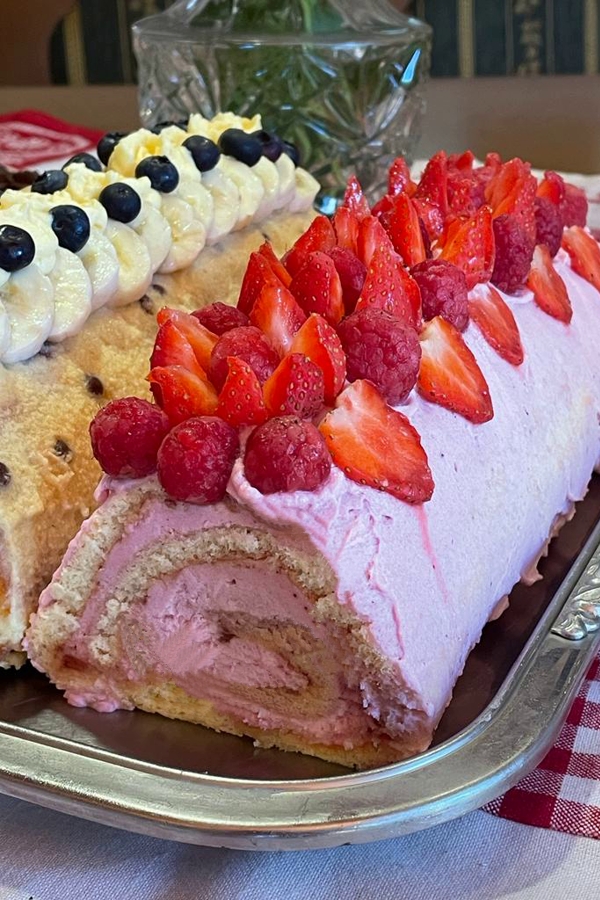
Strawberry & Cream Filling
Ingredients:
- 200 g strawberry jam (7 oz / ¾ cup) - for spreading on the baked roulade
-
350 g strawberries (12 oz / 2 ½ cups)
-
400 g heavy cream (14 oz / 1 ⅔ cups)
-
50 g powdered sugar (1.75 oz / ⅓ cup)
-
2 packets whipped cream stabilizer (2 × 8 g / 0.3 oz)
-
1 packet vanilla sugar (8 g / 2 tsp)
-
powdered sugar for dusting
Method:
Wash and finely dice the strawberries. Purée 150 g (5 oz / 1 cup) of them until smooth. Whip the cold heavy cream with powdered sugar and vanilla until it forms stiff peaks. Shortly before the end, add the stabilizer, then fold in the puréed strawberries and mix until well combined. Finally, stir in the diced strawberries and chill.
Once the sponge has cooled, gently peel off the baking paper. Warm up the strawberry jam and brush it evenly over the sponge. This jam layer is crucial not only for taste but also to prevent the cream from soaking into the sponge. Let cool briefly, then spread the strawberry cream evenly on top.
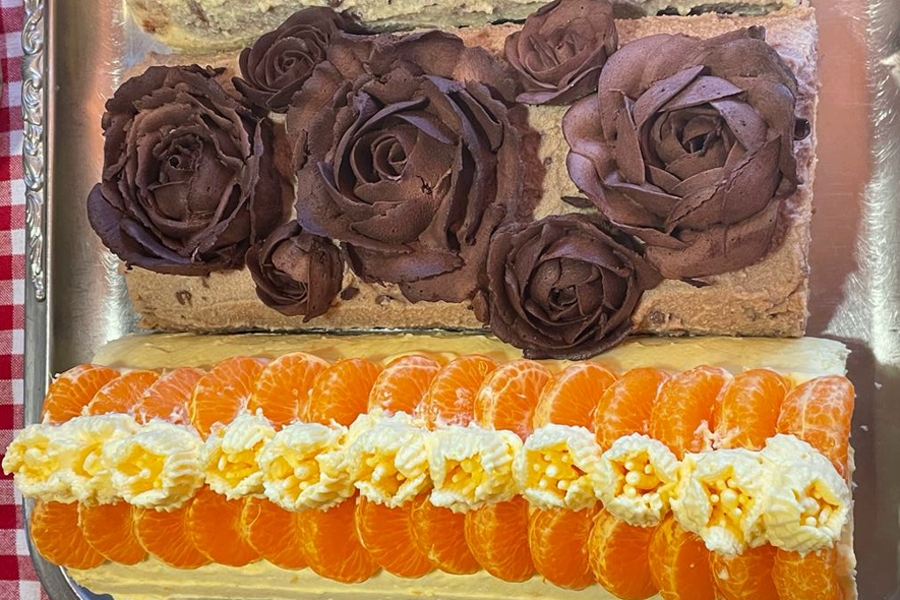
Using a clean kitchen towel, carefully roll the sponge up. Rolling will push part of the cream into the last third of the roll. Coat the outside with cream and decorate with strawberries — or simply dust with powdered sugar.
Light Parisian Whipped Cream
You can find the detailed recipe in the Rolled Wafer Recipes, and also watch the video on YouTubeYouTube.
Tip 1: Be sure to add chocolate chips to the cream – they give an amazing crunch! My daughter Johanka adores this version! 😋
Tip 2: It’s also delicious in combination with bananas – just slice them into rounds and roll them inside a sponge spread with Parisian whipped cream.
Heavy Paris Whipped Cream - for Filling and Decoration
If you want the cream to retain its shape for a long time at room temperature and are concerned that regular whipped cream might start melting, I recommend the amazing chocolate cream known as “Heavy Paris Cream.” With a bit of practice, you can even pipe beautiful chocolate roses from it. Recipe available here or on my YouTube channel.
Grandma´s Cocoa Filling
This is the cream of my childhood, so it’s mainly about nostalgia. With just a few simple ingredients, you can create a flavor that children especially love.
Ingredients:
-
Semolina (or substitute plain flour)
-
Butter
-
Cocoa powder
Method:
Cook semolina in milk into a thick porridge (or use plain flour instead). Sweeten, add cocoa, and let cool. To prevent skin from forming, cover the surface directly with cling film. After cooling, beat together with softened butter until creamy. You can also add chocolate chips.
More cream recipes can be found in the section CREAMS & CAKE FILLINGS
Tip: If you’re short on time or want something unusual, try flavored whipped cream stabilizers. I discovered some at Pati-Versand and was pleasantly surprised at their natural taste!
My recommendation: mix the powder into the smallest possible amount of water (less than the suggested amount), making just a paste, then fold it lightly into the whipped cream. The cream stayed firm and delicious! When I once mixed the powder into more water (as the instructions suggested), the cream turned out too runny. So here’s my warning: keep it minimal, and it will work perfectly!